 In this blog-post I’ll describe how to compile the RenderPluginExample for Unity 4 using XCode 5. The RenderPluginExample is described in “Low-level Native Plugin Interface” document in the Unity Documentation [Link].
Step 1. Download and unpack the RenderingPluginExample42.zip [link] from the Unity website.
Even through the Unity project will run when started, it will break when the bundle file (OSX dll) is rebuild.
Step 2. Open XCode project RenderingPlugin/Xcode3/RenderingPlugin.xcodeproj.
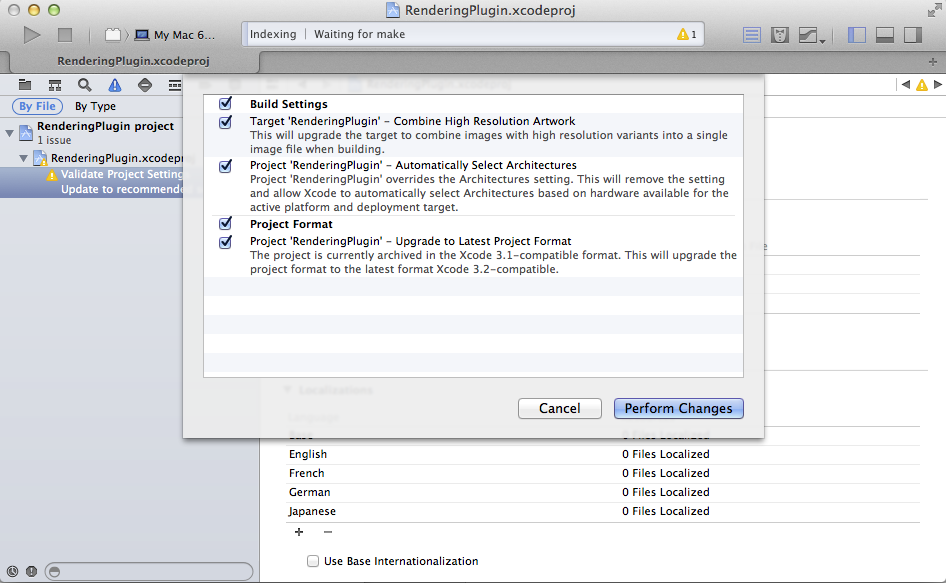
Step 3. Click on the yellow warning triangle to launch the migration dialog. Click ‘Perform Changes’ to migrate the project to XCode 5.x. (If you are asked to perform a snapshot then click Disable – not needed in this case).
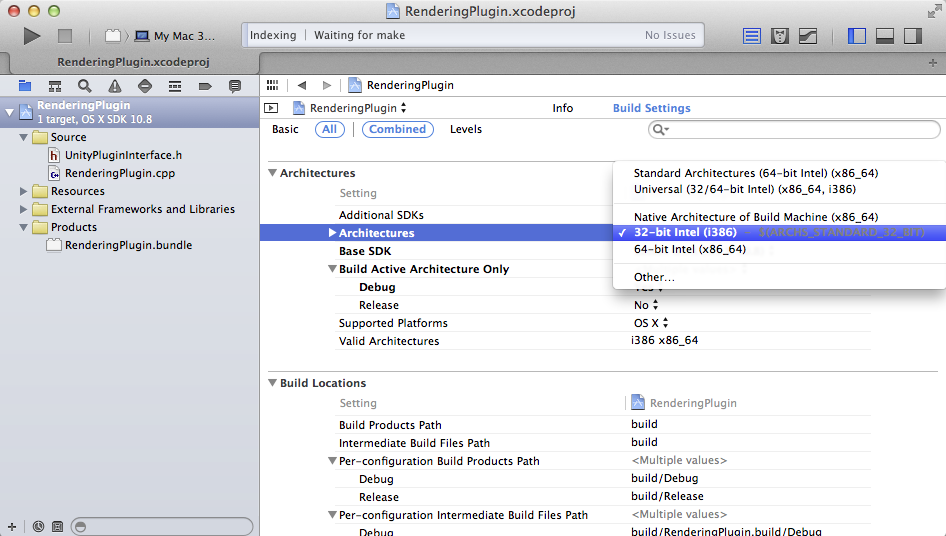
Step 4. Open the project settings -> Build Settings and change the architectures to 32-bit Intel (i386) (Unity currently runs 32 bit. Universal or x86_64 build does not work).
Step 5. Open the file “RenderingPlugin.cpp” change the OpenGL include to:
#if SUPPORT_OPENGL
	#if UNITY_WIN
		#include <gl/GL.h>
	#else
        //was include <OpenGL/OpenGL.h>
		#include <OpenGL/gl.h>
	#endif
#endif
Step 6. Rebuild the plugin. Copy the RenderingPlugin.bundle file (right-click the file in XCode and select ‘Show In Finder’) to the ‘UnityProject/Assets/Plugins/’ – folder. Replace the existing file. Restart Unity (this is important – otherwise the old library file is still used).
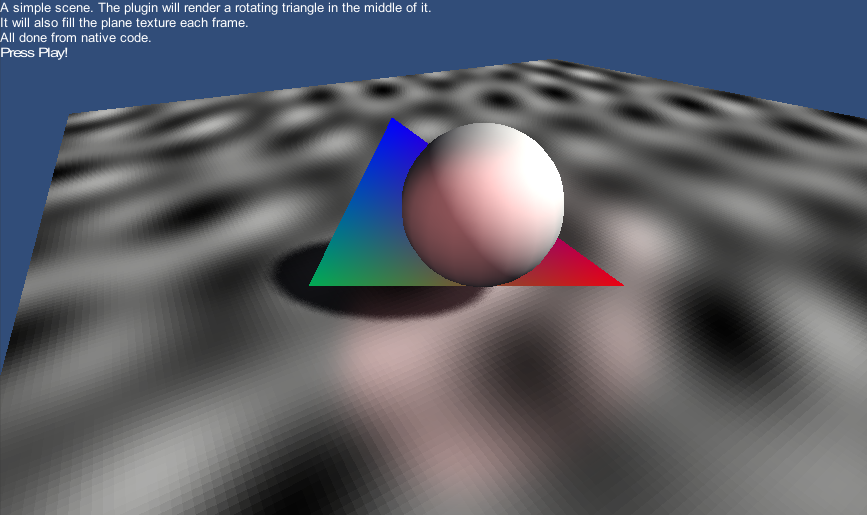
Step 7. Open the ‘scene’-scene and press Play to see the plugin in action.

Leave a comment